They come in many and varied forms, so I will need to generalise a bit, so here goes:
A) Rubber band type
- eg., American Halftrack and Weasel -
This track is a continuous strip of rubber which has steel cable in it
lengthwise and steel cleats crosswise. When used in sand I believe
they have quite a long life - say several thousand kilometres. When
used on Bitumen, rocky areas or with humid or salt air their life is severely
shortened. The trouble is that the rubber cracks, moisture gets in and once
the steel bands start rusting then the tracks' days are numbered. The most
recent price I have heard for a replacement set of recently produced (read -
later than 1974) is $5000 in Australia, that is mid-1990s. Somebody, somewhere, a few years
ago produced a batch of US Halftrack track with stainless steel cables
inside them - expensive, but thought to be well worth the cost - I have no other details
about this. I have since heard that this was not so successfull as the
stainless cable is not flexible enough and suffered from breakage. There
is an even more recent batch of track that had improved rubber and had
reverted to a higher spec of carbon steel cable - again no details to hand.
From Nigel in the UK comes the following comment in
response to a question on the Mil-Veh-List about roading a halftrack rather
than transporting it:
Dont even think about driving it that far !! I have an M16 myself and I
know from experience to take it by low boy (truck with a low slung trailer), I drove it 800 miles in 1994 on
Normandy 50th and couldn't believe how quickly the tracks wore down.
- apart from about 3mpg you will put a lot of wear on the tracks (they last
2000 miles max) and you are likely to encounter the need to adjust them
several times en route. The M16 is more weighty than the other models and
you will feel the drag as you go! The tracks wear less on wet roads....but
you arent in the UK! Check the tracks are properly adjusted and take it
gently reversing if you have loose tracks its a sure way to shed one.
Also on a long run you need to jack it up to relieve the transfer case
"wind up" from time to time.
Also check that all the bolts on the idler wheels are tight - they work
loose and then the holes oval and you have all the grief of replacing them.
Also check the bogie arm nuts are tight and lubricate the bogie suspension
slider and volute springs with light oil.
Nigel!
Track maintenance work in this case is the least for all types as
there is nothing to be done other than adjust tension and what Nigel has
noted above.
|
|
B) Dry Pin
- Probably the most common track system, because it
is cheap and simple to produce and maintain. These can be found on everything from
Bren Gun Carriers right up to Russian Main Battle Tanks. In most cases the
pins are in some way "captive", requiring a tool of one sort or another to
release a clip before the pin can be hammered out. But there have been
versions (mostly Russian) where the pins "float" in the links and as the
track passes a point on the hull there is a hard point which forces the
pins back into their correct position - crude but effective.

|
|
|
|
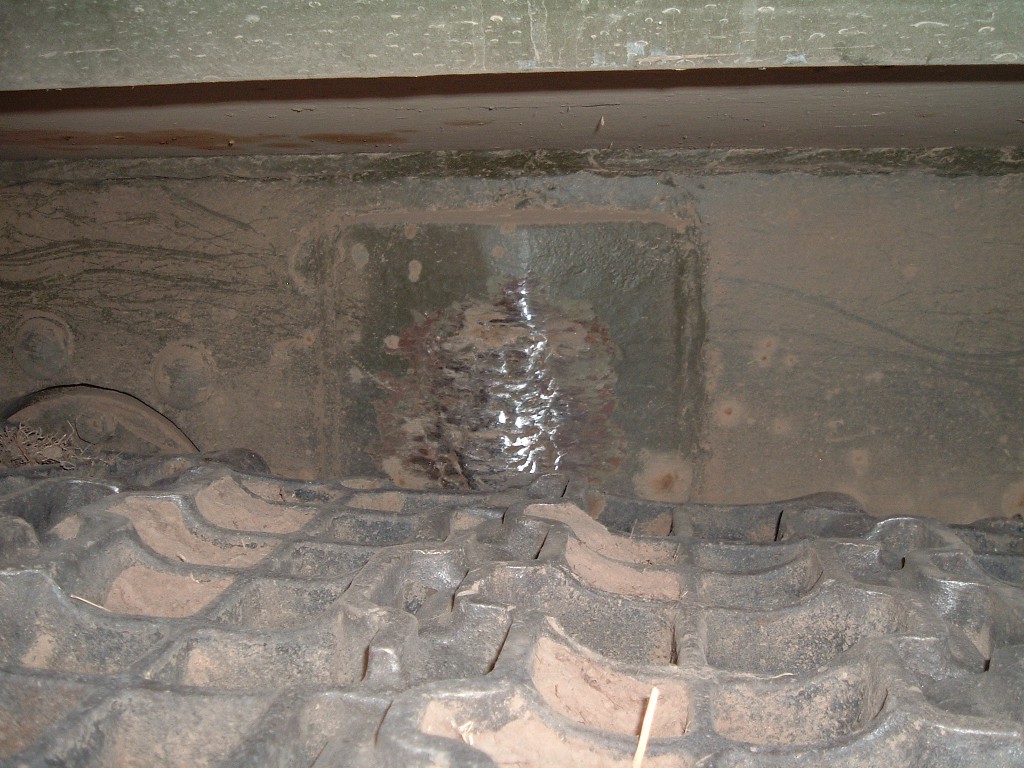
An interesting concept: the track pins only have swaged heads on one end. This prevents the pins working their way outwards, but not inwards. Thus to push the pins back into position a striker plate is welded to the hull. This design, although seemingly crude, got over all the problems associated with pin retention normally encountered with "dead" track. The downside is the noise, very distinctive and quite loud.
|
|
have to have access to a welder to do any real track work.
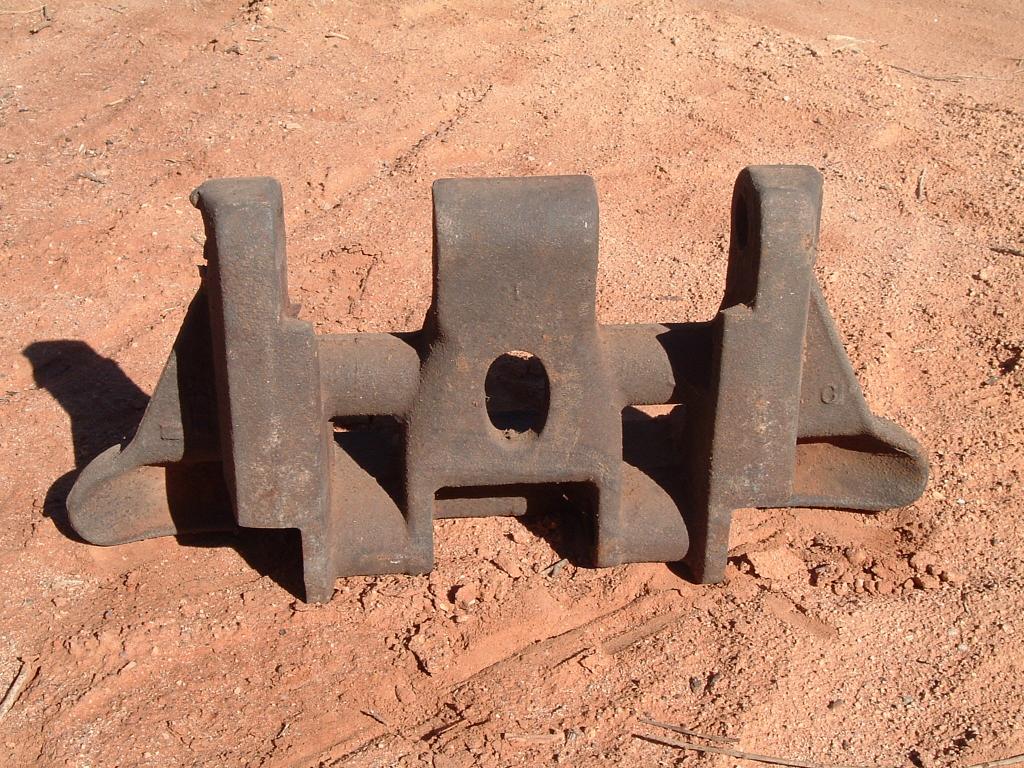
In the pic above you can see that the British most definetly regarded the Churchill as a "heavy" tank. There appears to have been no expectation of the crew changing out track links without support services. The pin that fits this hole is about 1 1/4" in diameter, probably to take not just the forces invloved but to allow for lots of wear. The link is damn heavy. Note that there is no track horn(s) (guide teeth) as the road wheels were of the Holt/Caterpillar type and had a skirt that overhangs each side of the link. These are noisy links, I was lucking enough to see and hear David Russell's Churchill underway at Beltring 2000 and experience the characteristic "clank, clank, clank" of the Churchill.
Dry pin track life is fairly short. The actual composition of the metal that the tracks are made from (and thus time in history when they were made) is important.
Dry pin track was always notorious for its short life, in the case of Bren Gun Carriers as little as 500 miles. The early track on Matilda tanks accounted for far more losses in action than did battle damage - it just wore out too quick. This is why the track depicted on the Tamiya 1/35 scale Matilda model is of one pattern (early - "H" pattern - as on a tank in the Bovington Museum), but all other Matildas I have encountered, especially ones which have had to work for a living, are fitted with late pattern "chunky" track. Very different and instantly recognisable once you have seen it. Actually, it is really a scaled down version of the Churchill track but of different appearance.
The real renaisance for British vehicles came with the introduction of the Valentine Tank and its use of manganese steel tracks, roughly a 5 fold increase in track life.
As bad as Bren Gun Carrier track was, the technology involved in producing the pins was classified secret during WW2. I know a bloke who worked at the factory in Melbourne where the track was produced and he tells me that when the steel was being formulated there was an armed guard on the door the whole time. He still has several track pins, even today, that he took at the time; as he says there was nothing comparable in hardness and that they made great Centre Punches. This is probably more a comment on how bad metal technology was at the time (material shortages?) rather than how good were Bren Carrier track pins.
There is another bloke I know who still greatly prizes a set of American spanners he was given in the Pacific Theatre during WW2 as he says the English spanners they were issued were absolute rubbish and would burr (and stretch) after the first couple of uses.
C) Wet Pin or lubricated pin track
- This was a system favoured by the
Germans on their "lighter" vehicles, ranging from the Kettenkrad up to
the huge Famo 3/4 tracks. Essentially it consists of needle rollers
(pins) inside recesses in the track links in grease or oil with an
appropriate seal to keep things clean. Usually there is a grease nipple
or oiling point on every link. In the case of the Kettenkrad there is
several thousand needle pins on a single vehicle, so you can imagine what
the tracks on the Famo would be like.
The beauty of this system is that the pins are replaceable and thus
when the track wears beyond limits, you can overhaul it instead of
throwing it away. Normally fitted with some sort of replaceable rubber
track pad.
Very expensive to produce, but with proper maintenance and overhaul,
has a very long life.
|
|
as "Flow Fat" which is a semi liquid grease.

|
|
Item 20 is the snow version with an extension grouser.
Item 1 is the standard link.
Item 9 is the needle bearings on the inner race.
D) Live track - 2 principal types:
1)"End connector" - eg WW2 American Stuart, Grant/Lee and Sherman.
This system uses a rubber molding with at its centre a skeleton made of
steel, on each side of the pad project 2 steel pins, so if we look at the
track from the side let's call them the
L and R pins. Onto the L pin of one link and the R pin of another goes an
"end connector" (the tooth of the track) this is held in place by a
wedge bolt which also fits into a facet cut into the side of the pins.
|
|
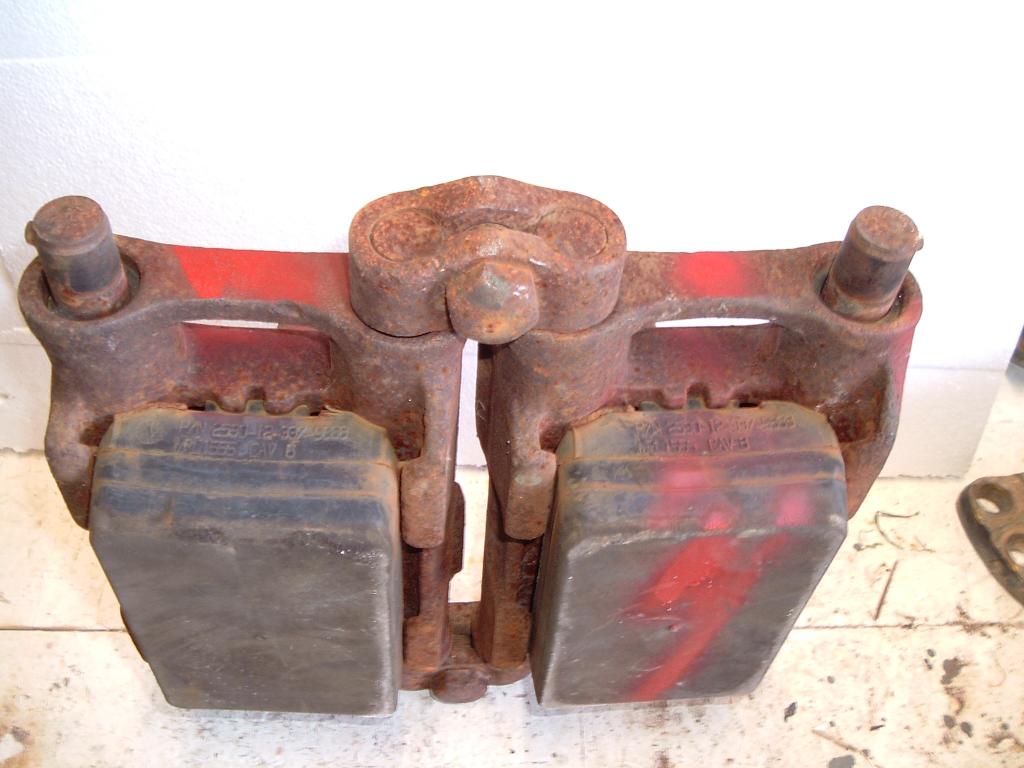
Note that this is the uncommon version as it has the inbuilt grouser (ground gripper) instead of rubber on both sides. This was not kind to roads and it was standing orders for it to be swapped for rubber block track as soon as possible in US service.
|
|
|
|
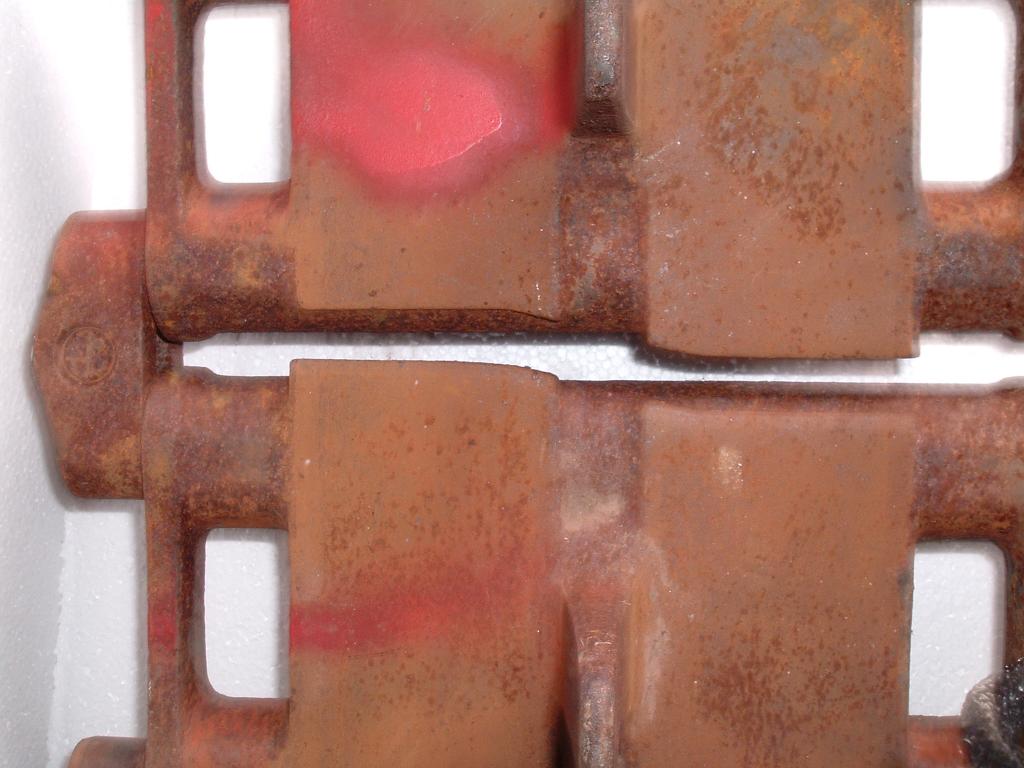
The infamous "end connector" that so many US servicemen have come to hate. Because the retaining nuts have a habit of working loose, a wedge can then become loose and the track break. So daily maintenance involves checking every single nut and wedge, which is 2 per link. No fun when 1/2 of them are on the inside of the track and thus means someone has to crawl under the tank....

|
|
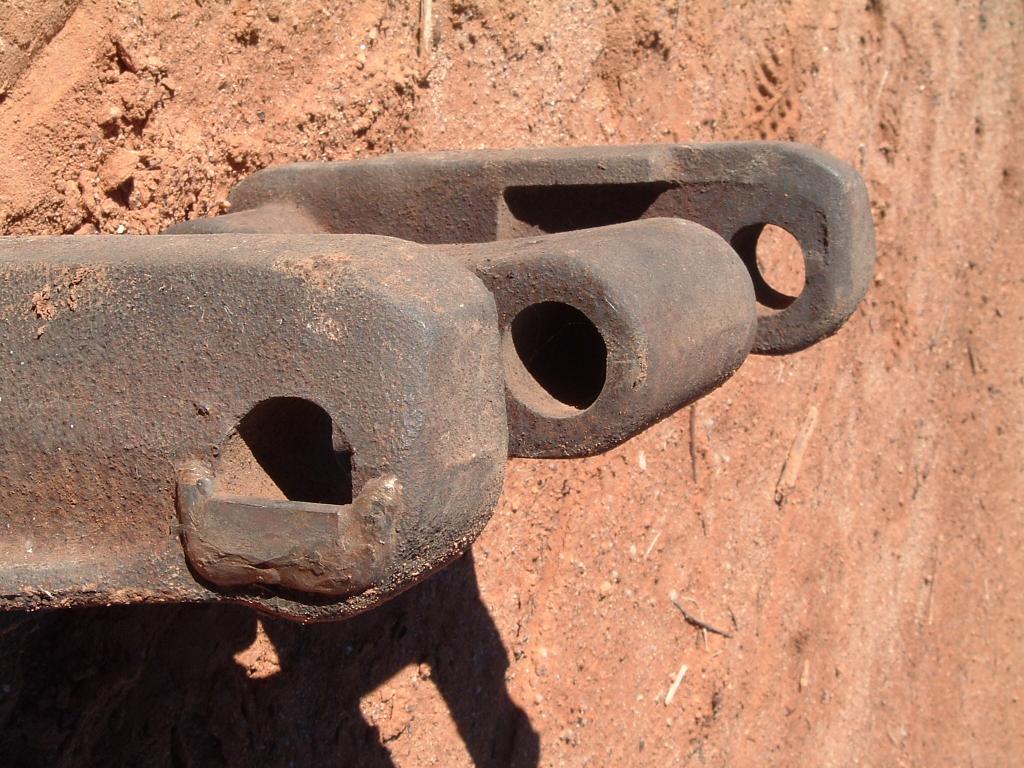
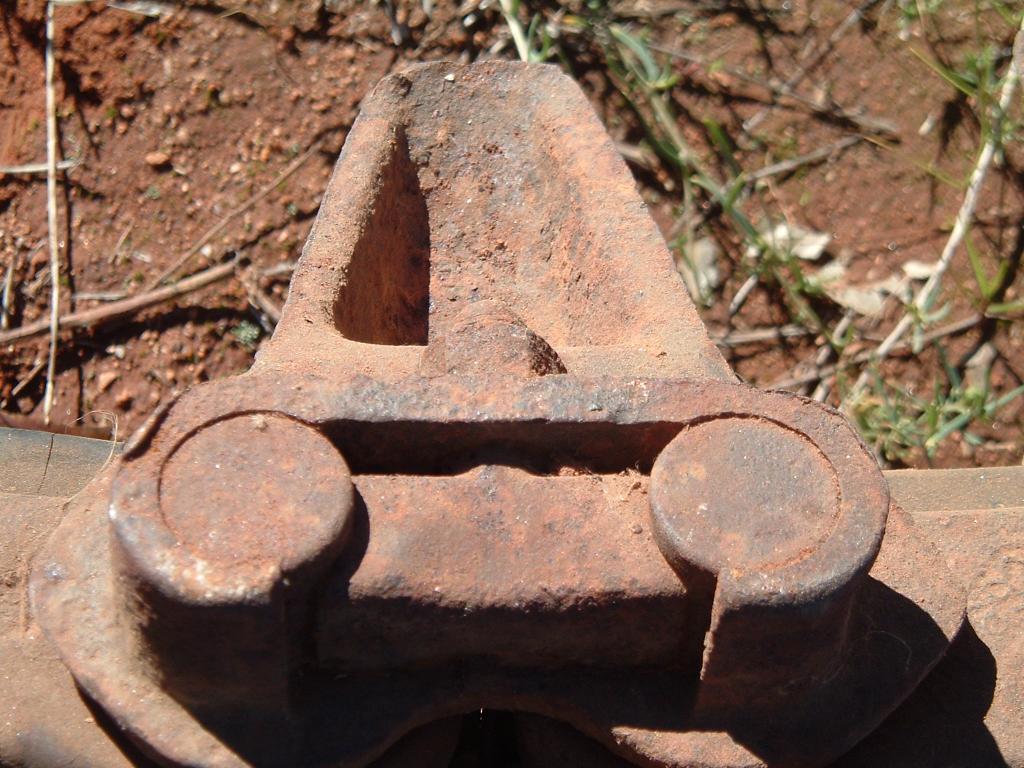
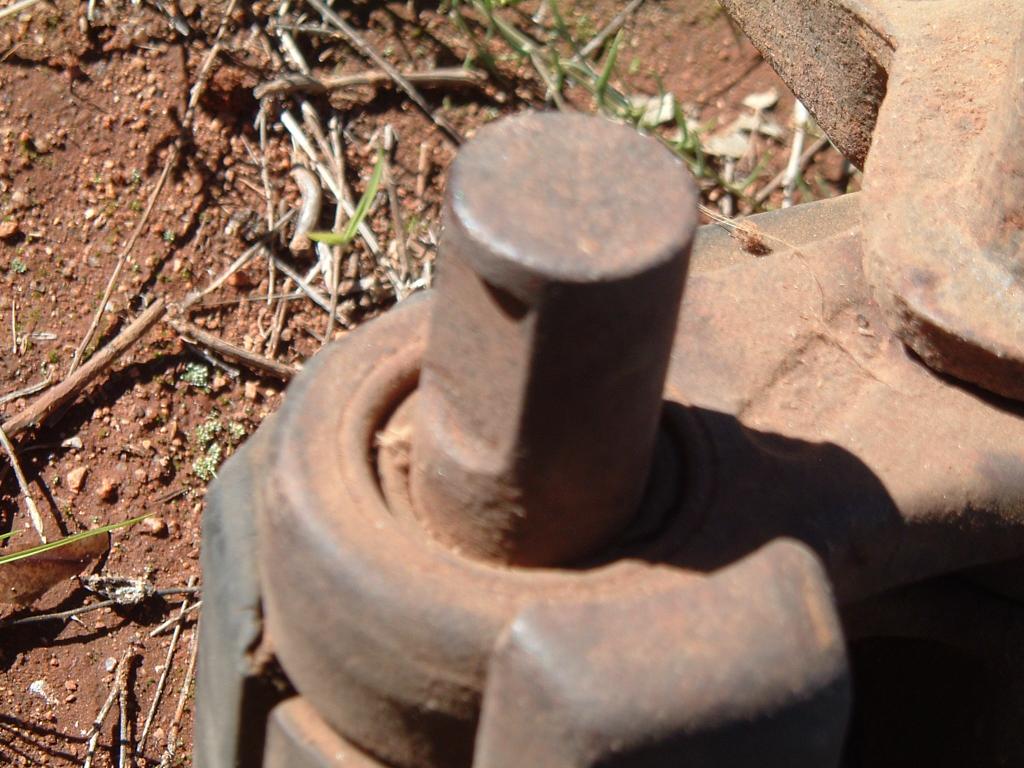
Nothing glamourous about this, it is just a hole. Just like in the T-130 link mentioned later. However, because of the end connectors, there does not seem to be the problem of "bush displacement" as seen with T-130. I think this was a technicality that the designers of the T-130 totally overlooked.
Quite why anyone went to all the trouble to push out the pin and bush I do not know, curiosity perhaps?
|
|
|
|
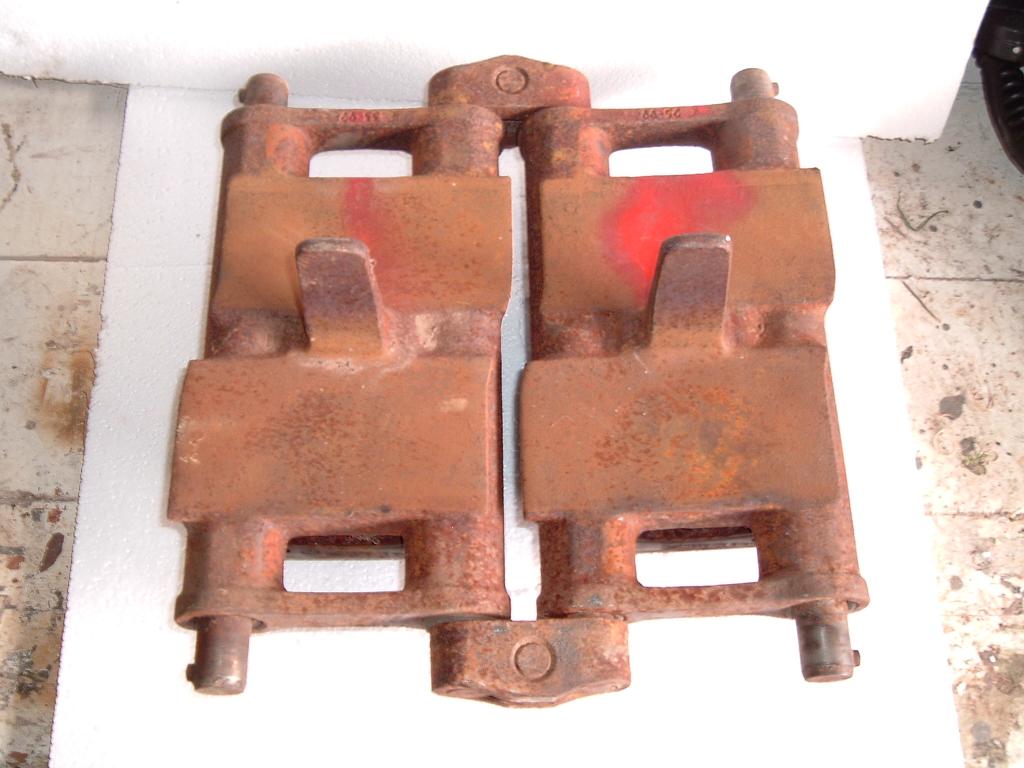
There is a popular misconception around that these blocks are turned over when the rubber has worn down and the face that was previously towards the road wheels can now be faced to the road - maybe this was originally factually correct, or perhaps applied to certain versions of rubber block track. But unless the pin in this link has rotated, then the facet cut into the pin is biased in one direction. What has me fooled is that the wedges are exactly that, so the slot should be cut vertical and the angle of the wedge would cause the 5� "set" of the link - I am stumped, perhaps somebody else knows?
I have never seen any evidence of links being turned over. In all except one photo I have seen and on the many track and links I have seen, nobody has ever bothered, - probably it is just too much work and the road damaged rubber will now be running against the good rubber of the wheels?
Anymore than about 3 links of this type of track when laid out on the ground will curve up so that the end links are not touching the ground. In fact this is a way of testing the track to see if it is still "live", if it sits flat on the ground it is then "dead" and considered worn out.
Although more expensive to produce than dry or "dead" track, live track is considered to be longer lasting and capable of higher speeds.
This type of track is still in production today, most notably, made by a German firm called "Diehl" and available as an "after market" retrofit for vehicles of many nations. There are differences, but it's ancestry is readily apparent:
1) They use a raised pin that engages a slot in the end connector, instead of the facet and wedge to cause the pre-load.
2) Most notably the sprocket does not engage the end connector, it engages "windows" in the link.
3)They also have their own patented attachment method for the track pads.
4) Of particular interest is the way they have overcome the old US live track problem of the gap between the links. Look closely and you can see an extension of the upper left and lower right face of each link. I would think this would serve to make for a much better ride quality than WW2 US live track. Much less shudder as the road wheels pass from link to link.
|
|
In the picture below you can see the relatively large size of the Diehl pad in relation to the track link. This is at first appearances much larger than the pad on US M113 pin type of live track (as used on US vehicles) which have quite small, fast wearing pads (see T130 info below). However, comparing the 2 together reveals there may be as little as 5% to a maximum of 10% more rubber on the road.
Likewise the Diehl link appears much smaller than the T130 link, but is actually heavier!
|
|
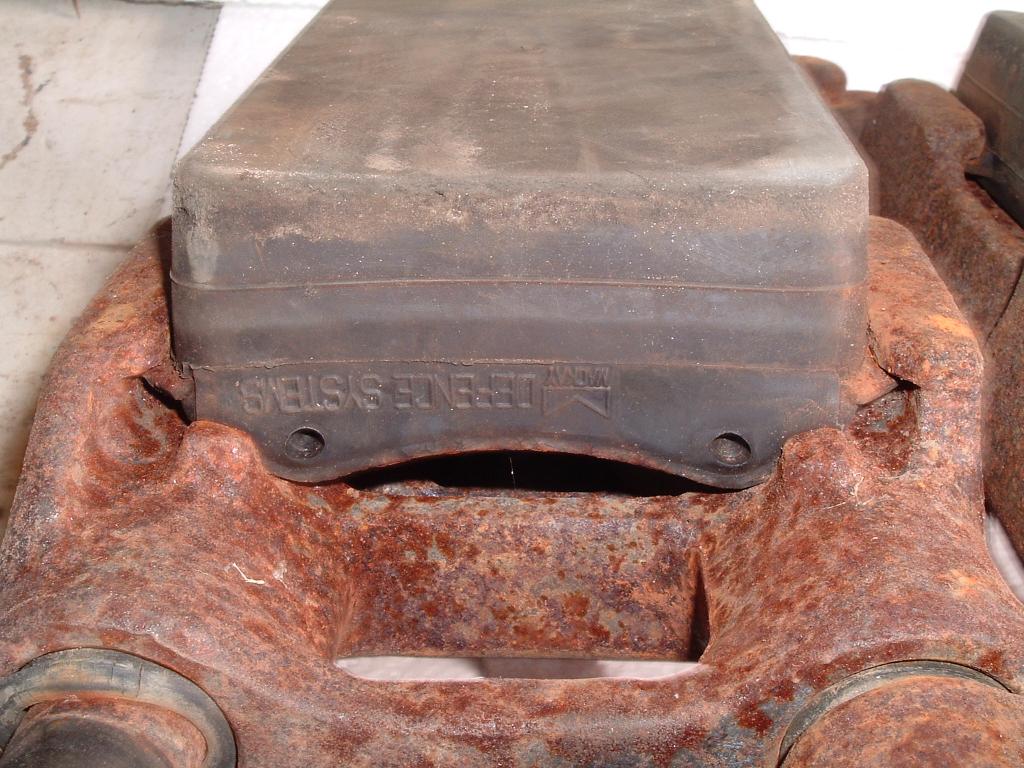
Detail shot of the handed "extensions" leading off each link.
|
|
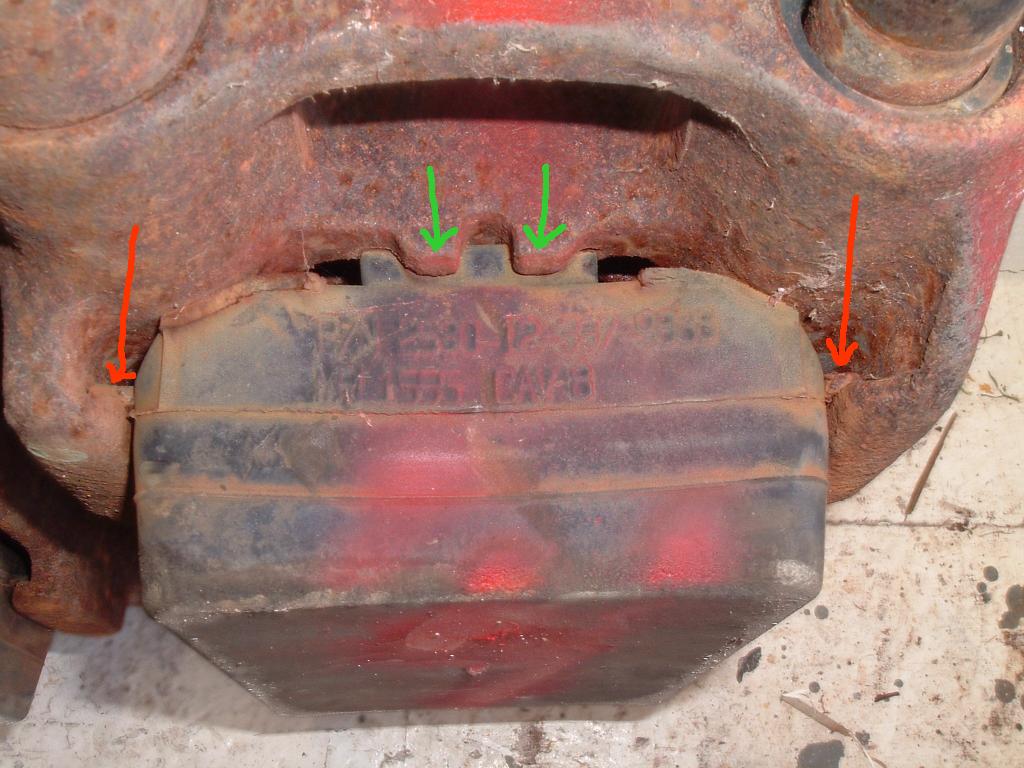
In these next 2 pictures you can see the pad detail. The 2 red arrows indicate the steel fins on the pad that engage in the link. The 2 green arrows indicate the method of retaining the pad in the link, which can only be inserted from one side of the link.
To remove the pad, a lifter tool is inserted between the pad and link which forces the "tongue" on the base of the pad up and allows it to clear the lugs in the link. Once this is accomplished, a good solid whack with a special tool and a hammer (or a whack with a sledge hammer) will move the pad about 1" sideways to disengage fins on the side of the pad and it will come away from the link.
This design is a vast improvement on Leopard 1 pads which have to be driven all the way off the face of the link.
|
|
|
|
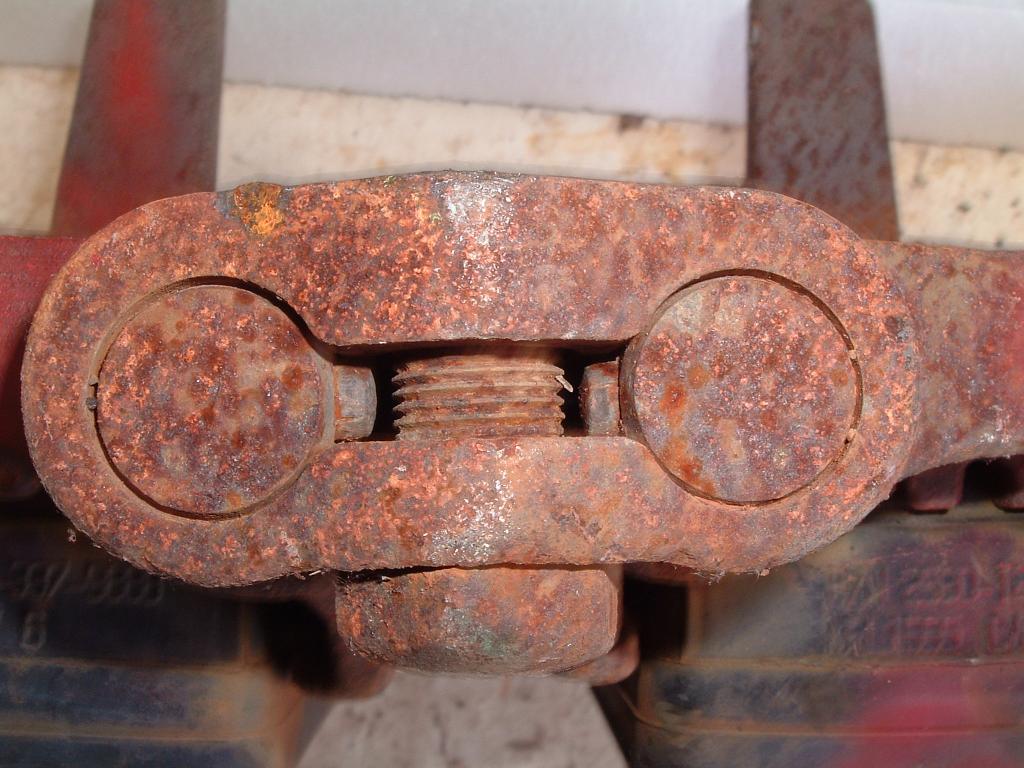
The end connector with the locating lugs facing the bolt thread in closeup below. It appears to be little more than a piece of squashed tube. There is no internal ledge or other diameter changes. It seems there is a lot of faith in the tightness of that bolt and the security of those lugs. But still an improvement on facet and wedge of US WW2 track.
I am told that the Australian Army has trialed this particular version of Diehl track but is now buying an improved version.
This model of Diehl track supposedly has a life of 15,000km!
The downside is that the end connectors require a specific installation technique and it is not just a case of whacking them on and tightening the bolt.
|
|
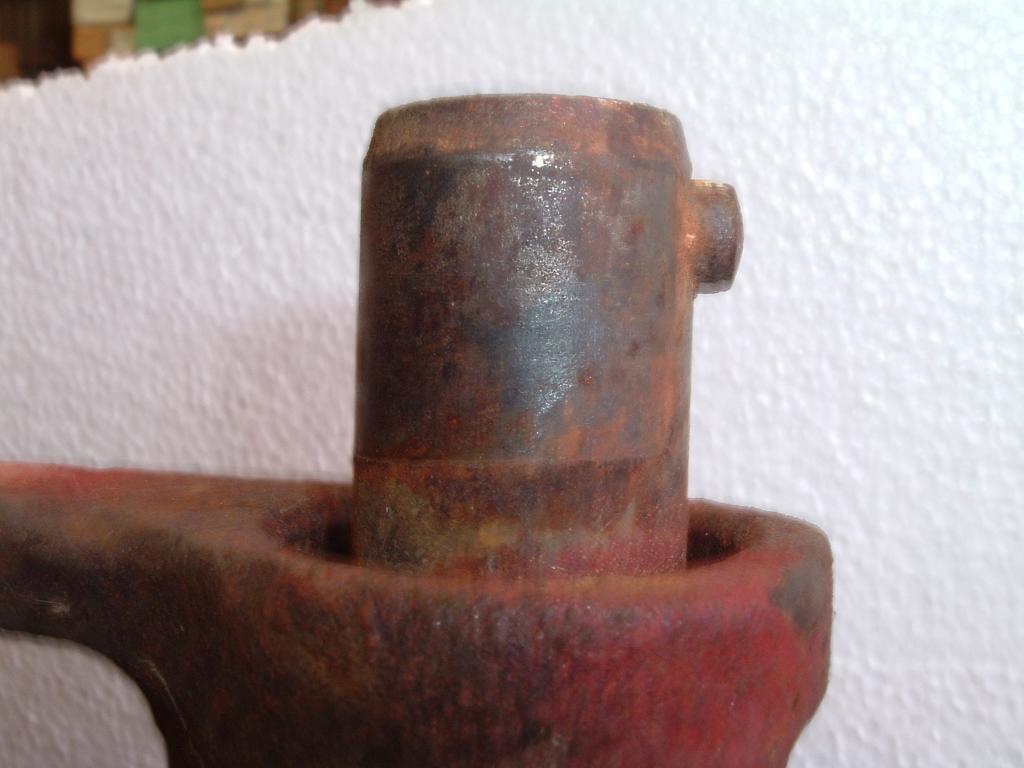
Detail shot of the locating lug that engages the pin end connector.
|
|
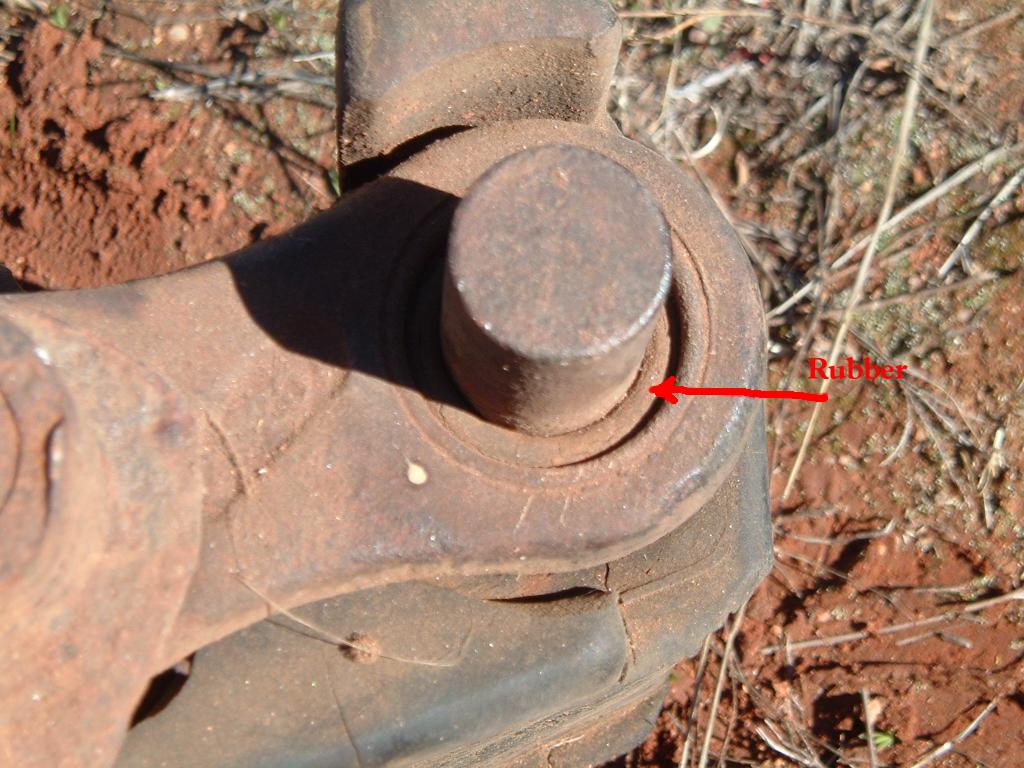
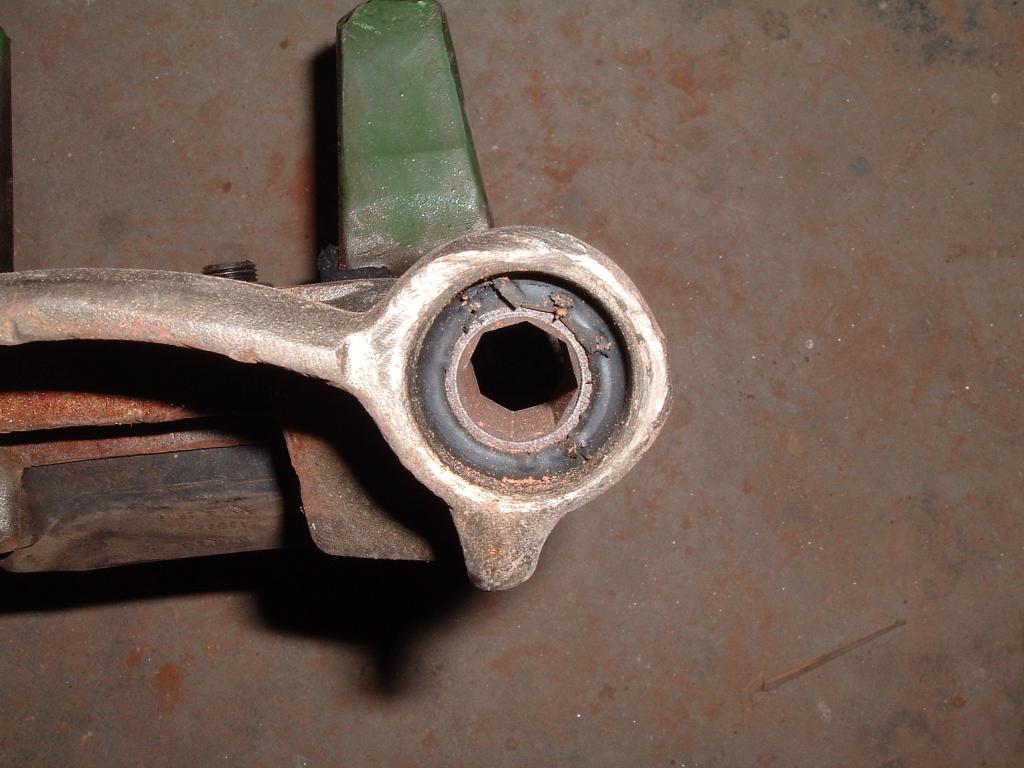
Detail shot of failure of track pin rubber bush. You can see how it has oozed out, strangely in this instance on the road side of the link. Normally I would expect the rubber to ooze left or right.
|
|
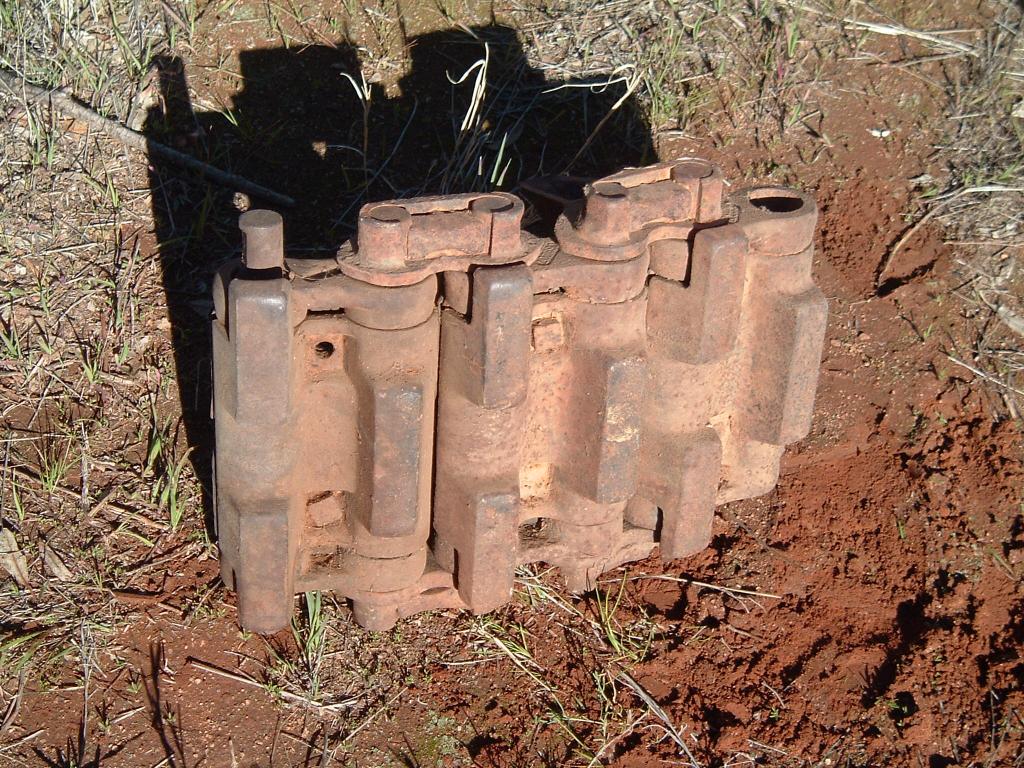
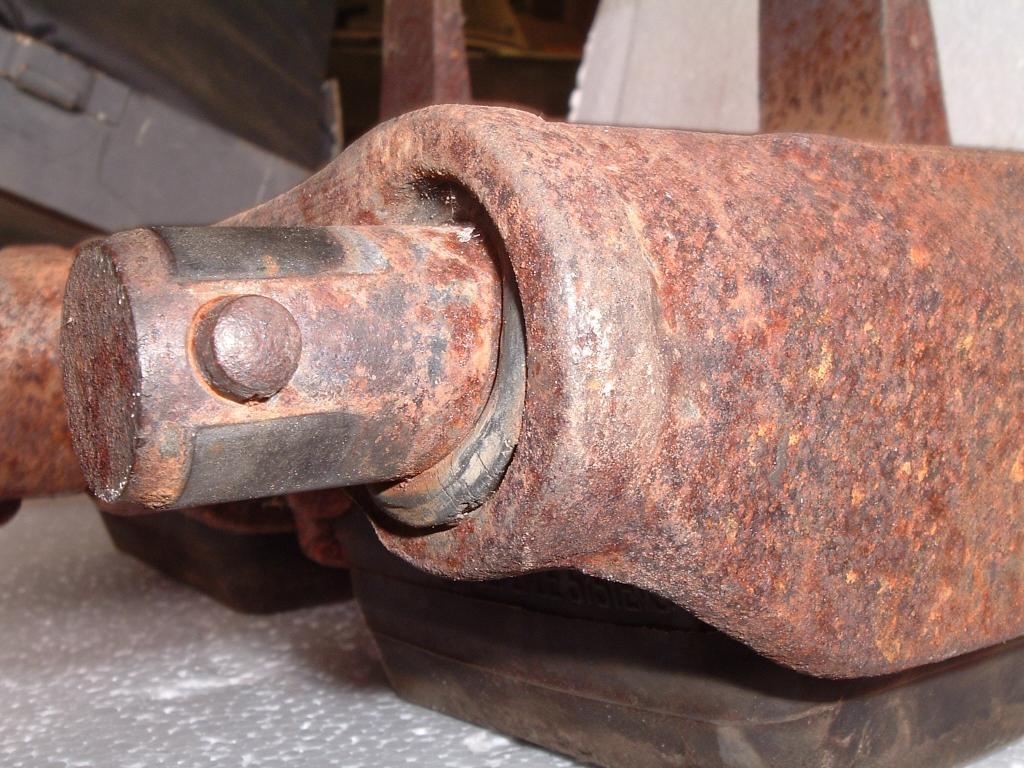
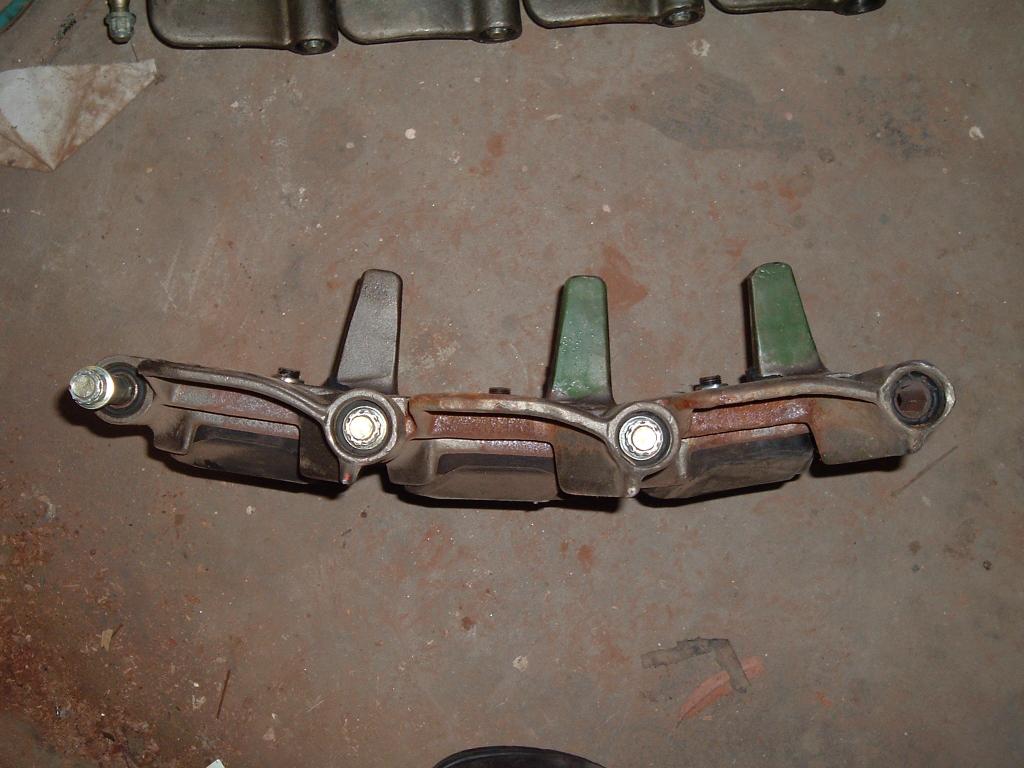
2) Removable Pin type - eg Modern US, M113 APC family. This track is normally rebuildable and consists of a track link with large holes bored through it, into these are pressed a rubber bush containing a metal sleeve with a hexagonal hole through its centre. Normally there would be a total of 5 bushes per joint (ie 3 in one link, 2 in the other where it mates). The bushes are pressed into the link in such a way as to make a 5� offset from flat, to give the same effect as the end connector track where the track will not lie flat of its own accord. The process of inserting the bushes requires a well equipped workshop, powerfull presses and the use of a lubricant!
So the rebuildable feature does not come cheaply. The hexagonal track pin is retained by nothing more than a self-locking nut at each end.
|
|
|
|
|
|
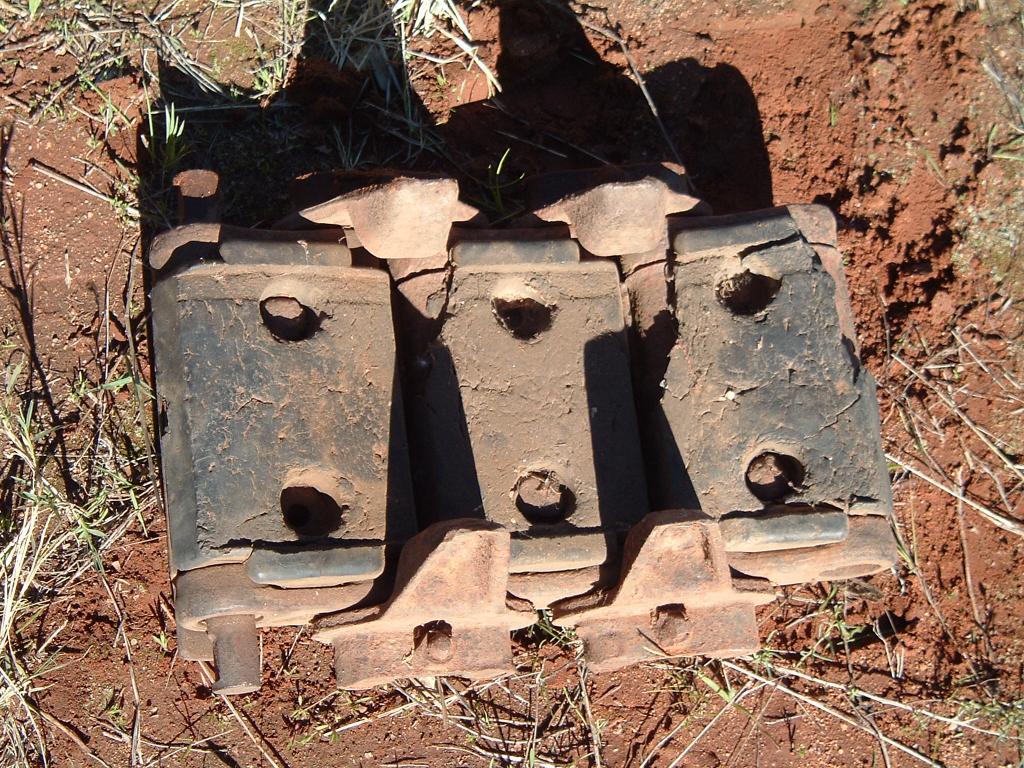
Due to what seems to be a design problem, the bushes migrate (bush displacement) with use of the track and partly move into the interlocking portion of the adjoining link. This makes what should be an easy job to "break" a track into a fight. Another reason why the military tend to just change out whole track rather than bad links.
Live track is a proven design and has a good safety record. The bad designs don't last long for obvious reasons. There are 2 longer use criteria that will signal when a track is reaching its end of life:
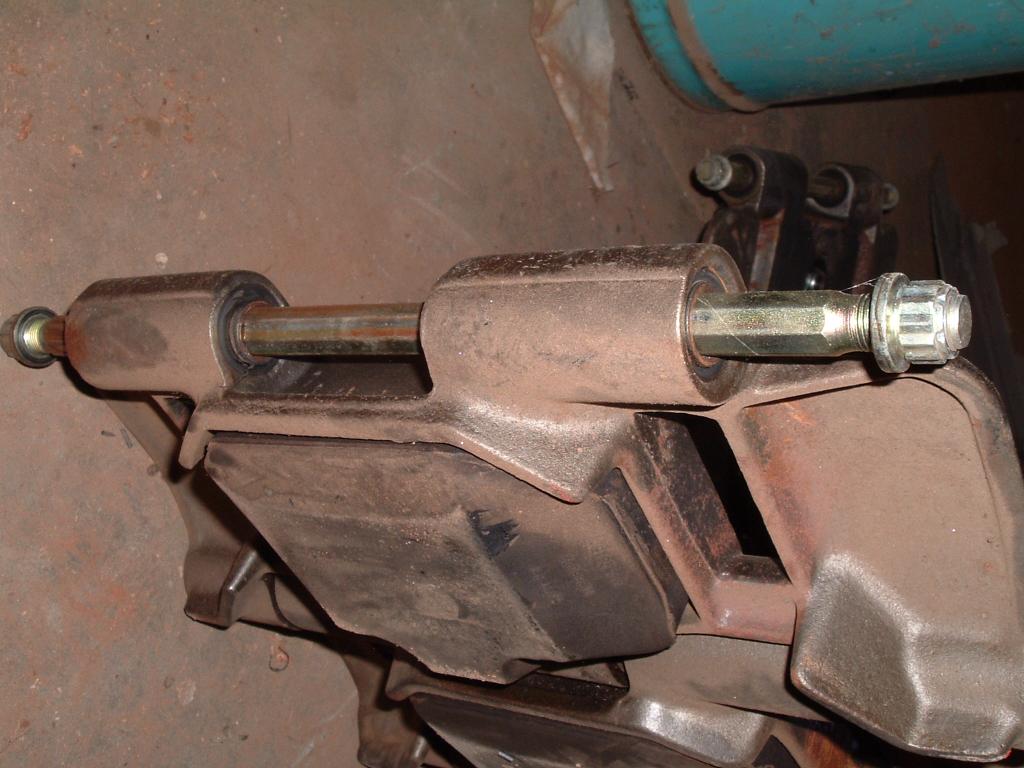
1) The pin nut is no longer centred in the link hole = bushing collapse.
2) General wear, sometimes referred to as "track stretch" this requires a gauge and is measured as the size of the gap between links.
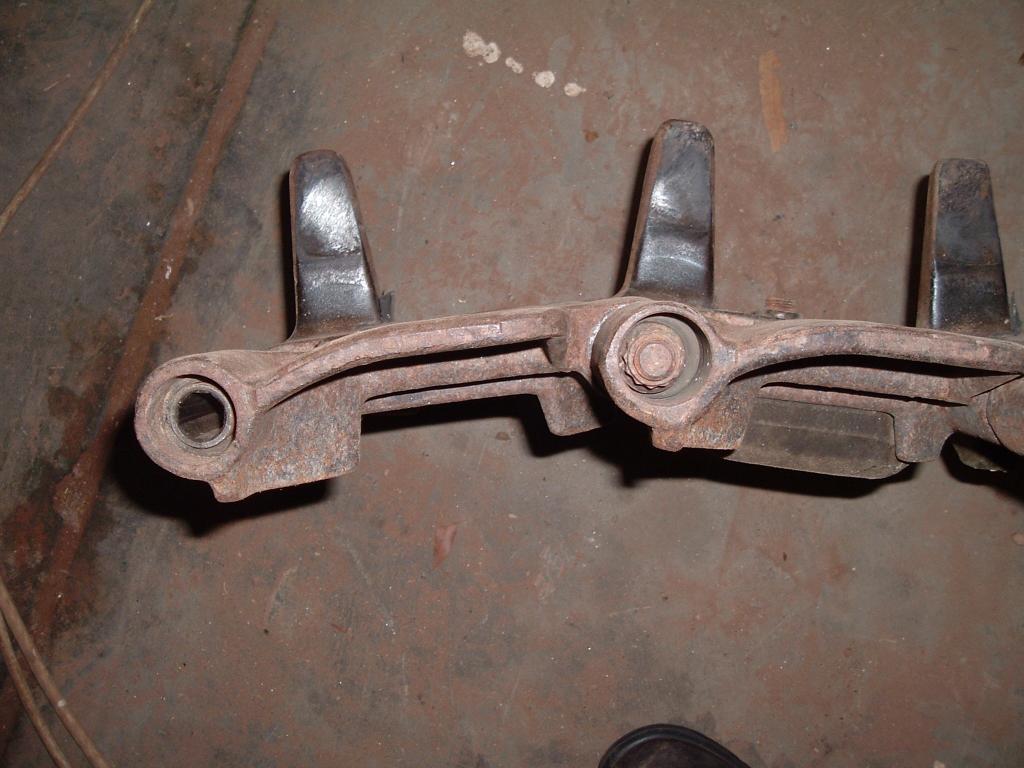
The final failure mode is when the pin itself wears, typically if the above 2 criteria have been ignored. This is normally indicated by an excessive gap in the link joint, say .4" (1cm) or more. There can also be noticeable burring of the interconnection faces between the 2 links due to metal on metal contact.
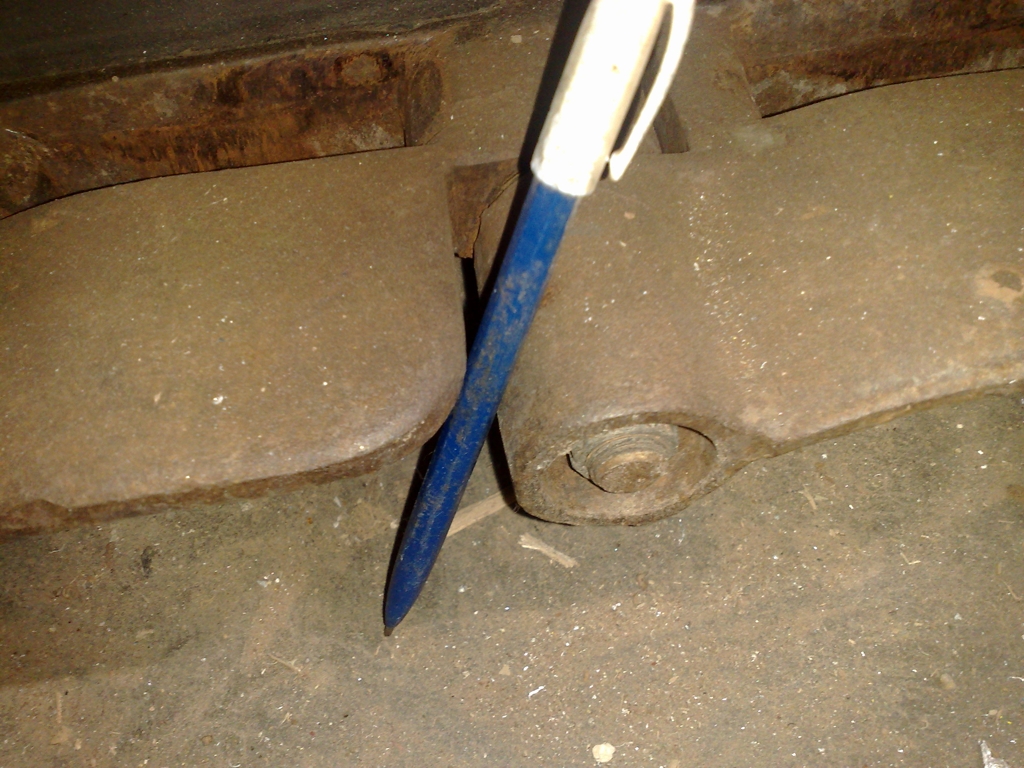
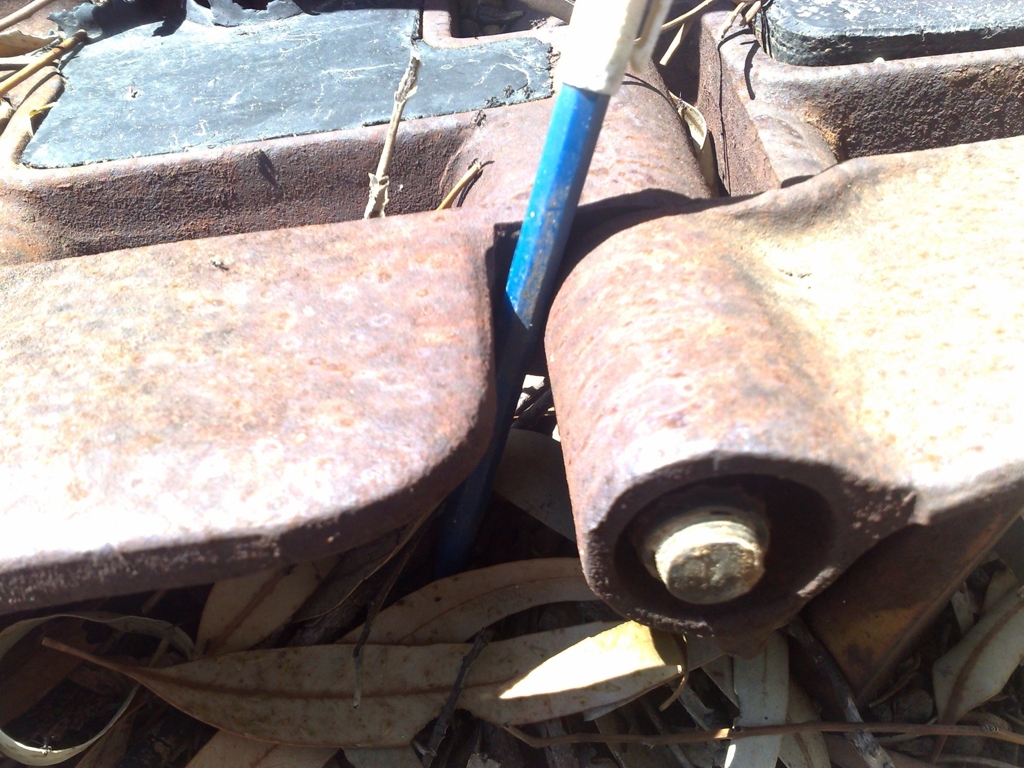
All things being normal, a pair of links (if one goes, normally the one sharing the same pin will go too) with a failed joint will be visible. This is apparent by the pin nut appearing off centre in the hole. However, the failure may be on inner bushes (the long 2). If this is the case, it is harder to identify, hence the use of a gauge in the joint next to the outer bush. I use the old "if a standard BIC biro will go in the joint then those links have almost had it" test, I would need to look it up, but I think the measurement is 1/4", a piece of 1/4" steel rod will also do the job. That is with the track TENSIONED. As you would appreciated, when you take tension off the links, the gaps close up.
Once you split the track, it is real easy to test, just waggle groups of up to 6 links, if any move easily, they are dead.
What I loathe is splitting links that have suffered from bush migration (where the bush from one portion of a link has partially moved into the matching portion of the opposing link). Having to pound in flat blade screwdrivers to force the bush back is no fun. Be careful not to burr or squash the bush!
If you are subtituting fresh link for some failed ones, you can see any migrating bushes. I have found the correct size G clamp is the best way to force them back, feed the new link in at an angle and remove any G clamps as you go. My record is 3 G clamps on one link.
Either that or change the whole track.
By the way, always store good track on its side, never flat and NEVER flat with other track or weight stacked on top of it. Flattened track, even if still live, has up to a 50% less life time.
|
|
|
|
There is one final problem with "live" type track. When it is worn out nobody and I really do mean NOBODY wants it. The scrap metal merchants don't want it as the smelters refuse to take it because the rubber portions are too hard to seperate out before it goes into the melting pot. Leaving the rubber on causes all sorts of problem, eg fumes and contamination etc. There is a limit to just how many garden borders can be made from it around army bases and it doesn't make good walk way or garden paths.
Usage.
As far as maintenance goes, dry pin and live type track both suffer
from a peculiar wearing effect where links roughly in multipules of 1/4
of the track length appear to wear out. So, given say a new track, you
will find yourself replacing worn links in positions of multipules of 1/4.
Then the next group will wear out and so on. The location of where the wear
will occur is not predictable. One thing I am assured of by tankies is that
a track rarely wears out all at once. No-one I have talked to appears to
know why this happens, but I am guessing it has something to do with a
resonation (like a sine wave / earthquake effect) where the track whips
more at some points than others as it goes around.
In battle conditions, the military will just change complete track
sets as it is not worth the down time mucking around with individual links
but in peace time you will find them changing out individual links as
this wear occurs. To give a really rough idea, lets say that at the point
where most links will be 75% worn, you will be finding some that have reached
their replacement criteria.
I need to point out that the wear is not that of ground abrasion, but is
the collapse of the bushing rubber on live track or the elongation of the pin
holes on dry track. Most track wears at the link joints so it doesn't last
long enough for the link itself to fail from ground abrasion.
Please note that the 1/4 length wear - better described as "divisible wear" -
as some types of track will wear at 1/6th, 1/8th etc., depending on length and
number of links, is more a problem with live track than
with dead track.
|
|

|
|
Rubber Pads
Most "western" AFVs now come with track pads, be they molded into the track (like Stuart/Grant/Lee/Sherman) or replaceable (M113, Leopard etc). The pads are there principally to protect the road surface and secondly to improve the ride, gunnery and vibration failure factors. The pads are typically of a rubber appearing substance (possibly synthetic these days) and do not have as long a life as the track links, as the pads by their very nature have to be fairly soft. Several years ago there was an article in the MVPA "Supply Line" or "Army Motors" magazine which detailed one M5 Stuart owner's experiments with using Polyurethane as a replacement for rubber. This met with moderate success and was in reality limited by the problem of having to try and bond the Polyurethane to the remaining rubber. I would expect that Polyurethane would be quite successful by itself; the problem being that it is not feasible to try and remove all the rubber from WW2 US track as it must be done mechanically, not by burning (the pins are rubber bushed in an internal tube, this bushing is destroyed by the heat and the track is then useless as it is dead).
Addendum: Well, someone has done it the hard way and there is now re-manufactured WW2 track with new rubber available in the US, click on the link below to read the article on this site.
New rubbered track!
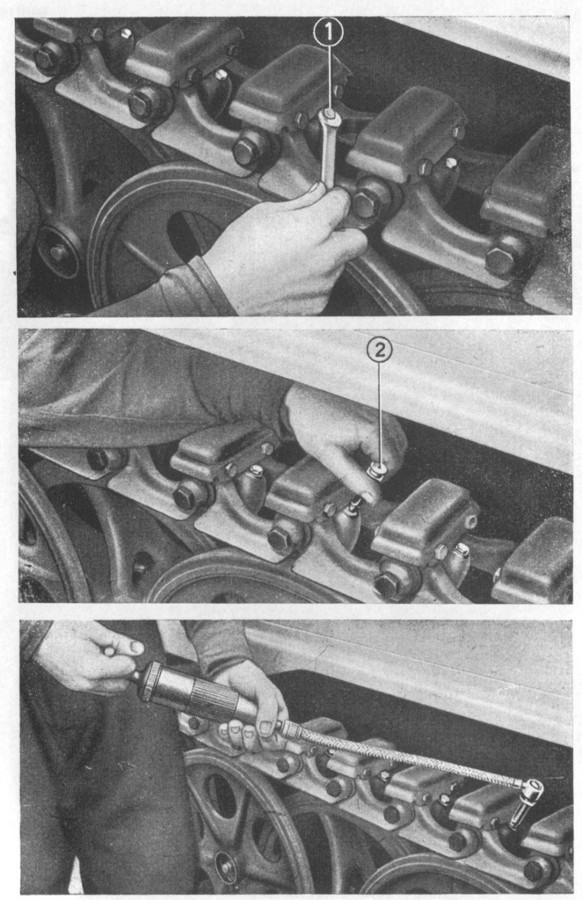
Tension
This is usually vehicle specific and the correct amount of tension must be obtained from the user manual appropriate to the vehicle. Anyone who has seen the incredibly sloppy track on some of the heavier WW2 Russian vehicles (such as the KV and JS families) can only but wonder how the tracks ever stayed on. Especially so when you compare it to the tension of the high speed track on modern AFV's eg British Scorpion CVRT. But it did the job.
It is very much a case of "horses for courses": too tight and you will cause rapid wear of both track and drivetrain, too loose and you will throw a track on a turn.
You will find that the vehicle crews always had rough and ready equivalents for track tensioning and wear limits. Where the manual might say "use special tool number XXX", or "measure X inches from the rounded shoulder" (very difficult), the crews will have found that a cigarette packet layed on its side etc is nearly the same and has the advantage of being always to hand. Which is more than can be said for special tools.
Just be carefull when told these equivalents that the object used is still made to the same dimensions as back then eg, cigarettes used to come in packets of 10.
Safety.
Track is one of the ultimate finger dangers. It is just so easy to be moving or working on track link and to move it or have it move when you least expect it and get a finger pinched. Any injury is usually fairly nasty due to the amount of weight involved in even 2 links. Be aware that typical track weighs several ton each side of a vehicle which makes splitting track hazardous. Add to this the trip hazard of most track when it is not on a vehicle. Please take care.
That's about it for a quick and rough guide to track technology.
Discussion with John S. Buckley, USA
>You have me intrigued. I have never done the car crush thing as
it has
>Would you go into details please about what happens to the track?
Doug,
We were using 50 ton tanks just like that guy a year or so ago in San
Diego.
Good luck, John
>always worried me if I got it wrong I might end up rolling the
tank on
>its side (light tank).
A large tank will crush cars just fine. The problem was that the
torn metal etc. tore the rubber pads on the track to pieces. This meant
that the tracks would need to be replaced after a while. Track replacement
on an M60 was a major job.
My concern is that collectors using old vehicles
and old track run the risk of seriously damaging the track on their vehicles.
I have enough of a problem with old rubber on my weasel track and a replacement
set is $2000 if you can find them,and even then the rubber is 50 years
old and brittle. If you have somebody driving a Sherman or a Centurion
with steel tracks then there shouldn't be a problem (aside from the political
ones generated).
I just noticed that you are in Australia, correct? I assume
that you are not part of the MVPA convention car crushing proposal. I would
be reluctant to try it in a light tank (M3,5 series). An M24 or M41 might
be ok because of the greater weight.
My dream has been to own an M3 series,
but I can't afford to buy one or probably even run it. My weasel is housed
250 miles away so for me to get any work done on it requires a major logistics
effort and a complete weekend where possible. I am at the point of having
to possibly replace the starter (ugh) and maybe the generator.
You have my permission to quote me on your web page, thanks for asking.
 BACK TO INDEX BACK TO INDEX |