A quick "how to", the process can be applied to any removable fuel tank on any vehicle.
My Kettenkrad petrol tank caused me lots of grief when the rust inside started turning up as a micro fine powder in the carby. This stuff was finer than talcum powder and blew through the inline petrol filter as if the filter did not exist. The carby promptly stopped being a carby with very little warning each time this occurred. Luckily for me, both times, the vehicle was either in my shed or within a few metres of it.
The best solution would have been to cut the top off the tank off, get it all sandblasted, MIG welded back on then slosh it. However, the vehicle is painted with nitro cellulose paint, which ceased to exist in Australia in the mid-1970s. The colour cannot be matched with modern paints so I was out of options.
I used an Aussie equivalent of POR-15 (the US stuff). My choice of the KBS Australia system was based on personal preference. There may be cheaper/better/different equivalents in the market, it is what I chose.
The KBS Australia product comes as a 3 part system:
- Cleaner - industrial grade detergent.
- De-ruster - A Zinc Phosphate etch/primer.
- Slosh - A one pack (which APPEARS to contain no evil isocyanates health risk) silver coloured resin (Urethane).
When you use the cleaner you end up with what they call "flash rust". From what I can see, the cleaner strips any deposits from the tank leaving bare steel. You rinse this out with water.
Next you apply the surface preparer (de-ruster), again rinsing with water. Now comes something important, getting the tank dry
and driving out the water that will have got into seams and laps. I suggest a blow
heater and perhaps your wife's hairdryer (at your own domestic peril). Keeping in mind that any water you fail
to remove will become trapped by the sealer AND the sealer manufacturer states that water will prevent the sealer from adhering.
The flash rust created by the cleaning and any heavier rust remaining (in my experience) is not all removed by the 2nd step, which means there is
some rust entrapment once the sealing step is carried out. Thus you may want to consider more aggresive mechanical de-rusting.
See photos:
Download the big pics by clicking on the small pics...
Sealing cap.
Using the petrol tank cap to seal the tank would have meant it would have become lagged with the slosh or at worse case scenario permanently attached to the tank, so I made an disposable cap from a baby food can and some scrap metal. Which seemed like a good idea at the time. However, it leaked no matter what I did, so I needed to come up with something better.
Download the big pics by clicking on the small pics...
Sealing the filler neck.
The other leak, one that I knew existed from operating the Kettenkrad in hilly terrain was around the filler neck. On examining it there was no evidence of solder or for that matter any evidence of sealing from the factory. The problem being, what to use that would not cause problems with the paint scheme, that could be done neatly if it was to be permanent or that could be easily removed if not. The answer turned out to be good old fashioned "Stag Paste". Reading the instructions on the back of my historic can of the stuff revealed that it was water soluble - who would have thought that something fuel resistant would be water soluble? So I did a test spot on the paint on the underside of the petrol tank and all was good, no bubbling and easily removed with leaving marks. But the problem was then how to stop the water and chemical leaking out during the first 2 stages of cleaing? Thinning the Stag Paste so that it would run deeper into the joint and letting it dry overnight was successful.
Download the big pics by clicking on the small pics...
Tumbling.
The tank must be tumbled in all 3 dimensions to clean/treat/coat the inside, you have to keep this up for 15 to 20 minutes for the sealing application and as long as needed for the first 2 steps. I used a couple of buckets to make the odd shaped tank roll and my workbench as the track and also turned the tank end over end many, many times.
Download the big pics by clicking on the small pics...
Cap Mk2.
Not at all happy with my disposable tank cap I had another think and made a combined bung and viewing window from the bottom of a 1kg honey container.
Download the big pics by clicking on the small pics...
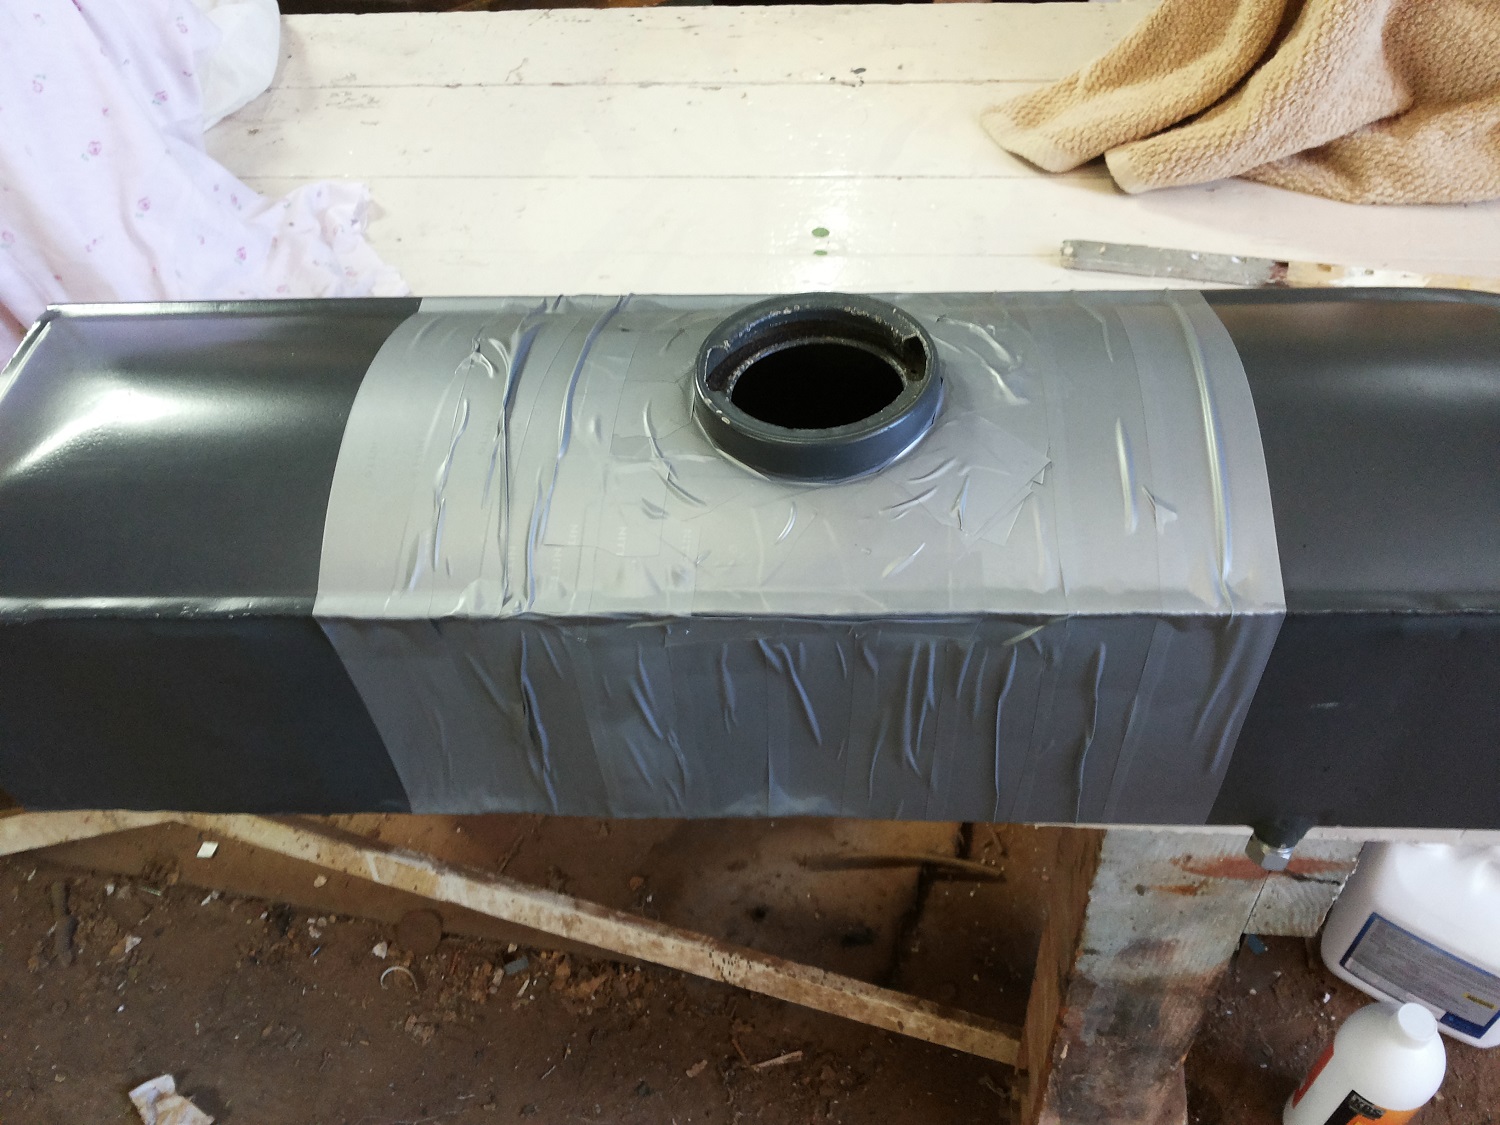
Ptrotection.
This stuff sticks like nothing else on earth, so you need to be really careful not to get it where you would dread for it to be permanent. As I cannot get an Aussie paint to match, I protected the paint with duct tape. Wiping off spills is possible if you get to it with seconds, but you are unlikely even then to be able to remove all indications of the spill without using very strong chemicals. If you are dealing with a painted surface, those strong chemicals will likely damage it.
Duct tape to the rescue!
Download the big pics by clicking on the small pics...
Cleaning.
Photo showing "flash rust" on the left with some heavier existing rust on the right.
Download the big pics by clicking on the small pics...
De-rusting.
- What my Kettenkrad petrol tank looked like after the cleaning then de-rust applications and before the sloshing compound. This photo is looking up towards the filler opening (taken by holding phone in 2 fingers down through filler opening). Tank top is to photo right, tank bottom is to left in photo.
Download the big pics by clicking on the small pics...
Cap Mk2.
Same location after sloshing. I am not entirely happy with coverage as it looks a bit thin at top of baffle. But a huge improvement on what I had. The slosh is humidity activated, knowing what I now know, taking the dry desert climate of Broken Hill into account, I would ignore the warning in the instructions to drain the slosh by 20 minutes maximum as it was slow to cure. In normal climates I would be following the instructions.
Lastly, I am not happy about the amount of rust remaining in the tank. I could have thrown some bolts and nuts in at the cleaning stage as suggested in the instructions that came with the sealer system (to knock the rust off). However, getting loose chunks of rust out from behind the baffles was enough of a hassle without putting further items into the tank that would hide and have to be pursued. Note the sealer manufacturer does state in the instructions that "it is not necessary to remove every last bit of rust before sealing". Regards Doug

BACK TO INDEX