The story of my Ferret actually begins in 1964 when I was 18 years old. I
lived in Elizabeth, New Jersey and was going to school in Newark. On the way
to school one morning I noticed a Sherman tank sitting in an auto wrecking
yard. School could wait, I had to check this out. As it turned out, the
Sherman was for sale. The owners of the yard started it up and gave me a
short ride in it. However, the price of $2000 might just as well have been
$2,000,000 at that time. Plus, I had no way to transport it and no place to
take it. But the seed was planted. Ever since that day I've had a desire to
own an armored vehicle.
Being an avid gun collector with a Curio & Relic Federal Firearms License,
I spend a bit of time on the internet checking out the gun auction sites.
One evening I came across an auction for a 1919A4 Browning machine gun. When
I went to the auction I discovered the gun was a dummy but was wrapped in a
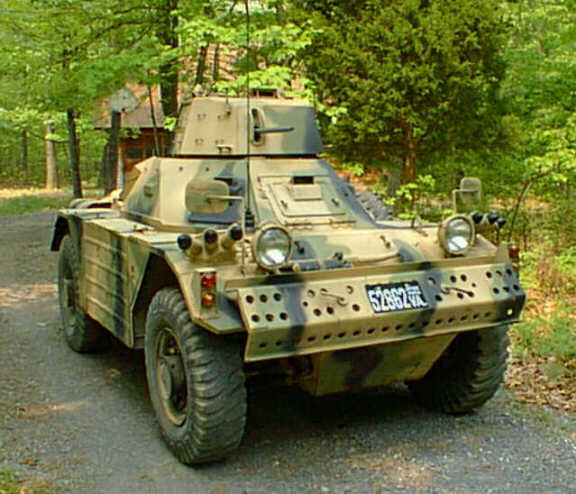
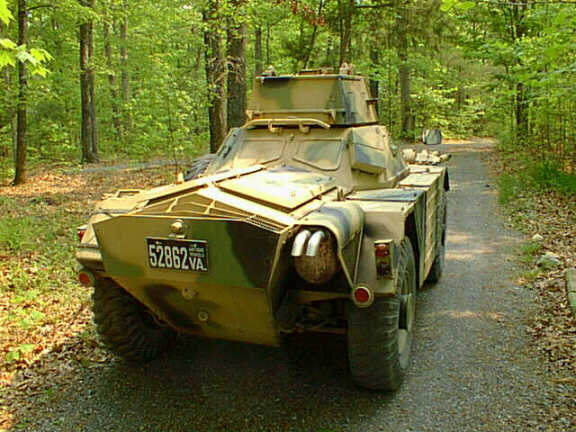
1961 Daimler Mk ll Ferret. There wasn't much info in the description and
there were no bids but there were a lot of pictures which looked good and
the price was considerably lower than others I had seen. I could even see
the odometer reading of just over 1500 miles in one of the pictures. First
things first. Armed with my wife's permission, I started an e-mail exchange
with the owner and started checking out the web for Ferret information. As
soon as I started talking to the owner, I had an immediate good feeling
about him. He had bought the Ferret from the widow of the previous owner who
had owned it for about ten years. The previous owner wouldn't let anyone
else drive it out of fear of damaging the transmission. The current owner
bought it, had it shipped from Florida to Pennsylvania and before he could
do anything with it, his life started falling apart around him. I won't go
into detail but he needed to sell it quickly. Since I live in the Shenandoah
Valley in Virginia and work entirely too many hours at my job, I knew I
couldn't spare the time to make a trip to Pa. to check it out. We worked out
a deal in which I would send him a deposit and when I came to pick it up, if
anything he had told me about the Ferret was untrue, I would get my money
back.
The next problem, which turned out to be no problem at all was how to get
it from Pa. to Va. My brother in law is an independent trucker so my next
phone call was to him. He said he could borrow a set of ramps for his
trailer and get a load of lumber to go to a lumber yard just south of the
Ferret's location so the trip would pay for itself. It all worked out
perfectly except he couldn't get the ramps. He did, however, have six 4x8
oak planks. So, at 2 AM one Saturday morning we headed for Pennsylvania,
dropped off the load of lumber in Scranton and headed for Ferret country.
When we met the owner at the garage where the Ferret was stored, he greeted
us with the unwelcome words "There's a problem". Seems the people at Pa.
Motor Vehicle had put Diamond Rio as the manufacturer on the title instead
of Daimler. Since their computer system wouldn't accept the Ferret's short
VIN, it had taken several weeks for the title change to be processed
manually and that didn't allow enough time to get it corrected before I came
to take possession. He did, however, have a copy of the Florida title with
the correct manufacturer and a correction form filled out and stamped by Pa.
Motor Vehicle. That looked good enough to me so we went to check out the
Ferret.
I knew the proper start up procedure and how to operate the Wilson pre
select transmission from reading everything I could find on Ferrets on the
internet. The overwelming majority of the information came from Doug's
Heavy Metal Gallery (Thanks Doug and all contributors).
It fired right up, the transmission felt good in all five gears, the
steering had no play and the brakes worked fine.
Knowing it felt good comes
from 40 years of being a mechanic (I started working on old cars several
years before I could legally drive them)and working on all sorts of strange
equipment. Several weeks ago one of my customers had me working on a huge
tugger that sits on railroad tracks and moves boxcars around their yard.
After a while you get a feel for what feels right.
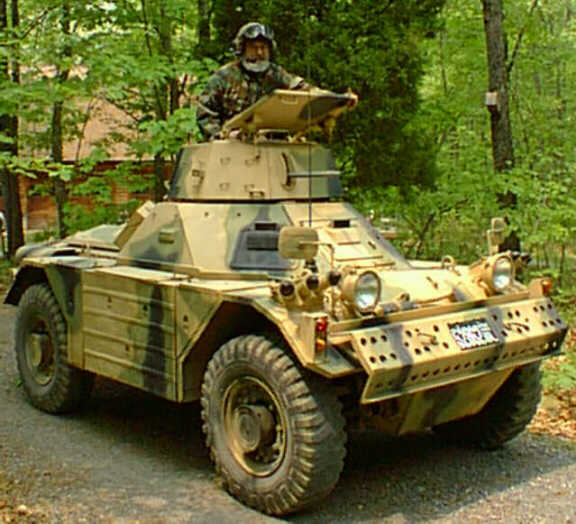
Externally, it was pretty
much all there except for the antenna mount on the left side toward the rear
of the turret.
|
|
|
|
|
|

|
|
|
|
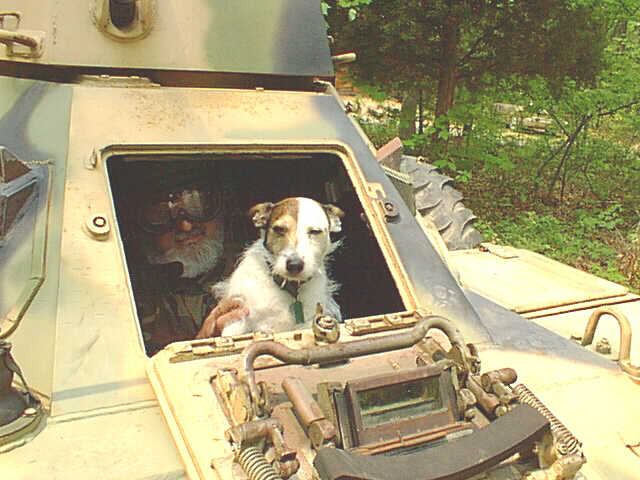
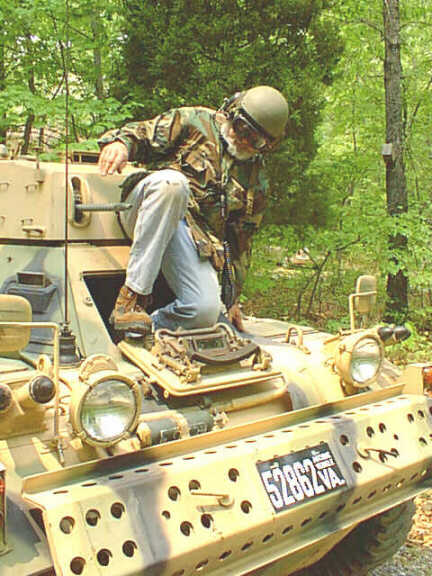
Bob demonstrating how to extract oneself from the Ferret's driver's position.
|
|
|
|
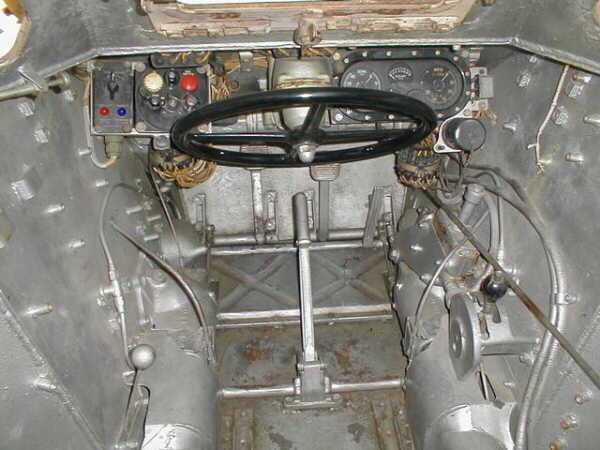
Internally, the commander's seat, the storage boxes and the radio gear were missing, plus the fuel gauge was inoperative, all of which I had already known from previous communication.
|
|
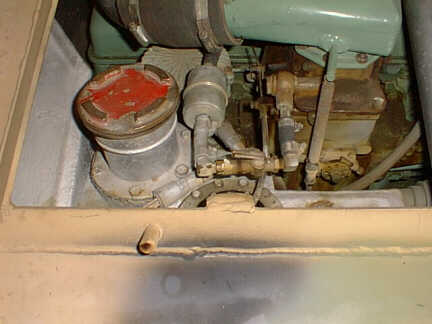
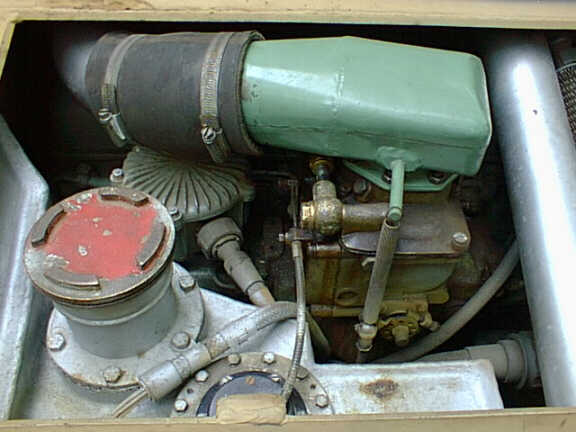
The only thing I didn't like was that the Florida owner had done a good thing but had done it badly. He had installed an electric fuel pump to fill the carburetor and avoid excessive cranking when the engine had not been run for a long enough time for the carb to dry up. The problem was he had eliminated the fuel valve and filter, blocked off the reserve tank, cut up the fuel lines and run rubber hose from the main tank to the electric pump and from there to the line going to the mechanical fuel pump. He had also cut the fuel line near the carb and installed a small automotive filter and a shut off cock. More rubber hose and clamps.
|
|

|
|
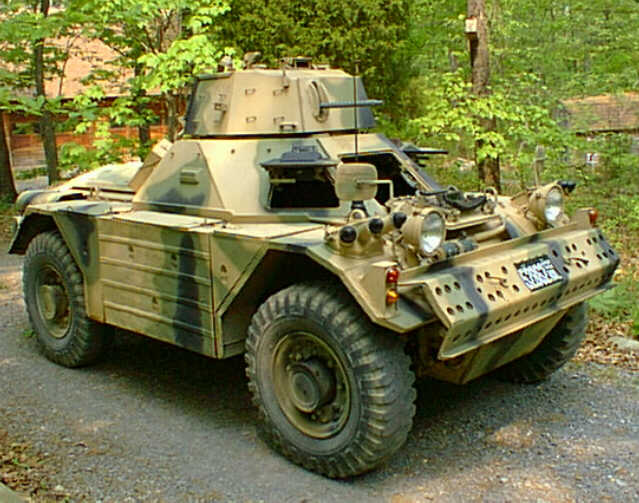
Doug: The air horn does not look original to me, but it is a very neat job.
|
|
|
|
Checking the outside storage bins revealed not only the original valve and filter but a lot of expensive accessories I hadn't known about. There was a windshield, a bag to catch empty shells from the gun, an original tool bag full of original tools, a spotlight, spare bulbs, an oil can, a fuel funnel and other neat stuff. We finished the deal and went to loading the Ferret onto the trailer. We backed the trailer into a hillside and bridged the gap with the 4x8 planks which we chained together to make a somewhat stable platform. I then backed up the hill and drove onto the trailer. This thing can really climb! The ride home was uneventful and unloading was successfully completed in reverse of loading.
The next adventure came when I took all my paperwork to Va. Motor Vehicle to get the title switched and to get antique plates. I filled out the forms and gave them to the clerk. She said the mistake made by Pa. Motor Vehicle didn't matter since I had their correction form. She did think that the 9000 pound weight listed on the title was a mistake. I assured her it wasn't. She told me I could get it weighed and come back for a new corrected title if I wanted to.Then came those same words again, "There's a problem". While she was entering my info into the computer, the system went down. I was told that everything would be entered when the system came back up and they would mail the title to me. Believe it or not, the title was in the next day's mail.
OK, now I've got this thing home and in my garage. It's decision time. Do I want to tear it down to the last nut and bolt, totally restoring it to a pristine show vehicle or do I want to drive it, maintain it and make improvements as I go? I make my living as a forklift mechanic and I have the ability and facilities to go either way. The first consideration is free time. With my work schedule, tearing it down and restoring it would involve years that could be better spent enjoying it. The second consideration is that it took me no time at all to learn that kids love this thing. I love kids and I enjoy giving them rides and letting them climb on the vehicle. This wouldn't be an option with a restored show vehicle. I figure the younger you get the next generation involved, the better for the future of preserving military vehicles. The third consideration is this vehicle really doesn't need any major work. Sure, it has some leaks but it's British from the sixties so that's expected. Decision made, drive it, maintain it and make improvements as I go.
Since I'm a forklift mechanic, I'm used to working on vehicles that have no room to do anything. I figured this wouldn't be too different. I was right. Anything you want to work on has two or three other things that have to be removed before you can get to the item in question. You spend a lot of time in uncomfortable positions and can't see a lot of components even with a mirror. Just like a forklift. I also have the advantage of having owned Land Rovers and MGs in the sixties and seventies so I am familiar with British automotive technology of that era.
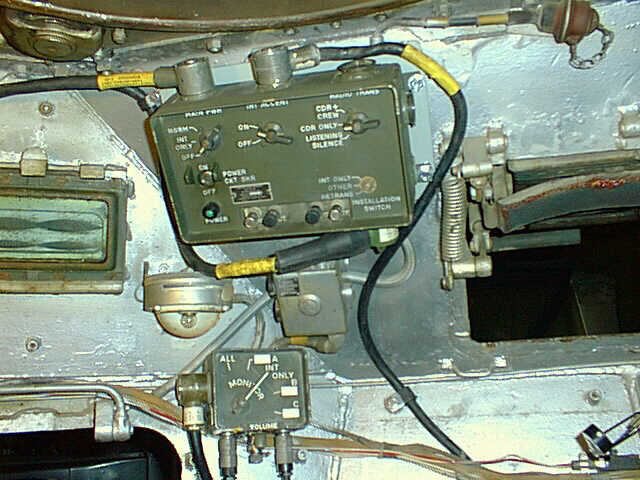
Other than the basic stuff like an oil change, grease job and checking all the multiple fluid levels, my first thoughts were to obtaining a commander's seat, fixing the fuel gauge and restoring the modified fuel system. I also needed an intercom system. There was a brand new fuel tank float unit in one of the storage bins so I was hoping it would be all I needed to get the gauge working. No such luck! Checking out the fuel gauge, I found the positive wire coming from the instrument cluster to the sending unit (or potentiometer or whatever you want to call it) had been removed from the connector block and taped. A little investigation with an ohmmeter revealed the reason. The positive and negative terminals on the sender were shorted, turning the sender into a crispy critter. The reason it happened was corrosion. Way beyond repair. Fortunately, the gauge checks out all right so all I need is the sender. I started making calls and found a dealer who had several of them on order, expected in several months with a large vehicle and parts order. He also had a used commander's seat which I bought. Still waiting for the sender. Next was the intercom. I originally had thoughts of getting a Larkspur series radio set and using the built in intercom but no one in England would answer my e-mails. I made contact with a fellow in Australia who thought he could help but that didn't pan out either. I gave the intercom a high priority since communication is impossible without one and with limited driver visibility I would really like to hear when the commander (my wife Nancy) says "Don't pull out in front of that 18 wheeler". I found an alternative on e-Bay. I made contact with a really nice fellow who had components of the American AN/VIC-1(V) intercom system for sale. I bought an amplifier, crew boxes, cables and a manual from him. I got headsets and AVC helmets from other auctions. I know this isn't the correct equipment for a Ferret but it will do until I find the proper stuff. It's also more practical than the Larkspur gear since the American system uses boom mikes attached to the headsets and helmets while the British system uses a hand held mike. I got it installed and it works fine. The helmets are great for keeping your head undamaged on all the protruding bits of steel inside the Ferret but in hot summer weather the headsets are a lot more comfortable. I'm thinking of installing another crew box with a handset in a weather tight box located where the second antenna mount should be so I can talk to people outside without shutting the engine down. There are special crew boxes designed to do this but I haven't been able to locate any and the only real difference is my crew boxes don't have an indicator light to tell you someone wants to talk to you.
|
|

|
|
The next problem I addressed was the fuel system. Running out of gas (petrol) on a lonely country road and not being able to use the reserve tank pushed this one to the forefront. I had a five gallon jerry can with me so I was able to get to a petrol dump but the situation needed to be resolved. First I disassembled the filter and the valve. I cleaned them up, made necessary repairs and mounted them on the bracket I had removed from the fuel tank. I had the line that connects the two but the end for the valve was hacksawed off and missing along with the top nut on the valve. I have a small lathe so I was able to make a new end. I found the proper size nut in my plumbing supplies, (just lucky) put it on the line and brazed the new end in place. I then attached the line and bolted the assembly to the fuel tank. Next was the line from the reserve tank to the valve. It was hacksawed near the valve but I had both pieces. I removed it from the tank and flushed the tank while it was off.
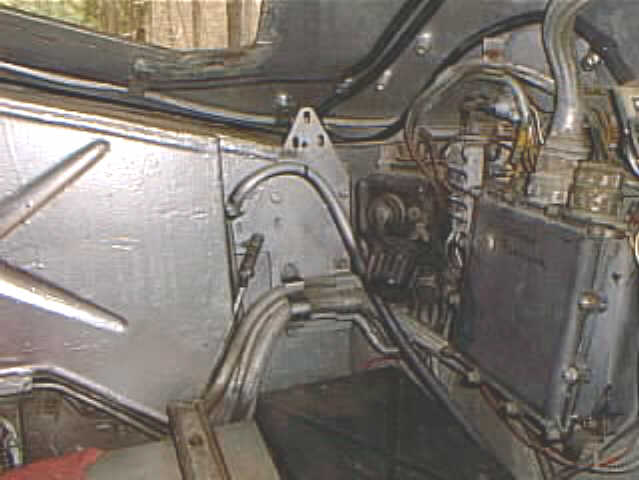
|
|
Back to the lathe to make a coupling to join the pieces. I brazed the coupling onto the halves of the line and reconnected at the tank and valve. The line from the main tank to the valve was missing but the banjo fitting was still on the tank and the other end was still in the valve. The electric fuel pump had been mounted in the built in box just below the left hand escape hatch. I took it out of there and made a bracket to mount it on the transfer case where the left hand rear driveshaft comes out. I then made a steel line to go from the main tank to the inlet side of the pump, brazed on the banjo fitting and installed it. The line from the outlet of the pump to the valve was next. I had the valve end so all I had to do was bend a line to fit, braze on the end and install it. Both connections at the electric pump were done with flare fittings, the lines being compound flared. The line going from the filter to the connection at the bracket near the bottom of the tank was also easy since I had both ends. I removed the line at the bracket, brazed on another coupling and put it back in place. The only thing left now was the line from the mechanical fuel pump to the carb. I removed the filter and valve that had been added and turned the banjo fitting on the carb 180 degrees to it's original position so the two hacksawed pieces were pointed at each other. Since trying to braze another coupling in place to join these pieces without removing the line from the engine compartment would result in a fire, I tried to remove the line from the fuel pump. I could have done it if my arm was about eight inches longer. My manual says the fuel pump should not need servicing between major overhauls. I think that translates to " You can't get to the fuel pump without removing the engine". The next time I have the entire engine compartment cover assembly off, I will try again. In the meantime, I joined the two pieces with a compression union. Another advantage to having the electric fuel pump in the system is being able to pressurize everything with it to test for leaks. Also, if the mechanical pump should fail, the electric one will get you home, it just can't be used with the fuel valve in the reserve position.
Well, that's about how things stand at present. The hull was sandblasted before the present paint was applied but everything was in place when it was painted. The fenders all show signs of collision damage being repaired without removing them. I would like to return to the original green color. The plan is to remove the fenders one at a time, make proper repairs, repaint that corner of the vehicle the original color, put it back together and move on to the next corner. Maybe someday I'll be able to retire and spend more time on my baby.
My thanks to Bob for this article.

 BACK TO INDEX BACK TO INDEX |